LINKS

HOME .......... ABOUT .......... WINKLE ARTS .......... PUNCH NEEDLE TIPS ........... FINISHED PUNCH NEEDLE ......... MINI PUNCH NEEDLE ...... HOW TO PURCHASE ...... ARCHIVE......MAIN SHOP ...... ETSY SHOP ...... FACEBOOK...... PINTEREST ...... INSTAGRAM
Showing posts with label punch needle embroidery. Show all posts

Sunday, January 31, 2016

Finishing Jack the Rabbit


"Jack the Rabbit" 
Bell Pull


First off enjoy punching Jack!
Cut a border leaving 1" off weavers cloth on all sides.


Fold and Iron the weavers cloth to the inside creating a hem. 
I use the hottest setting, and start with the long sides.


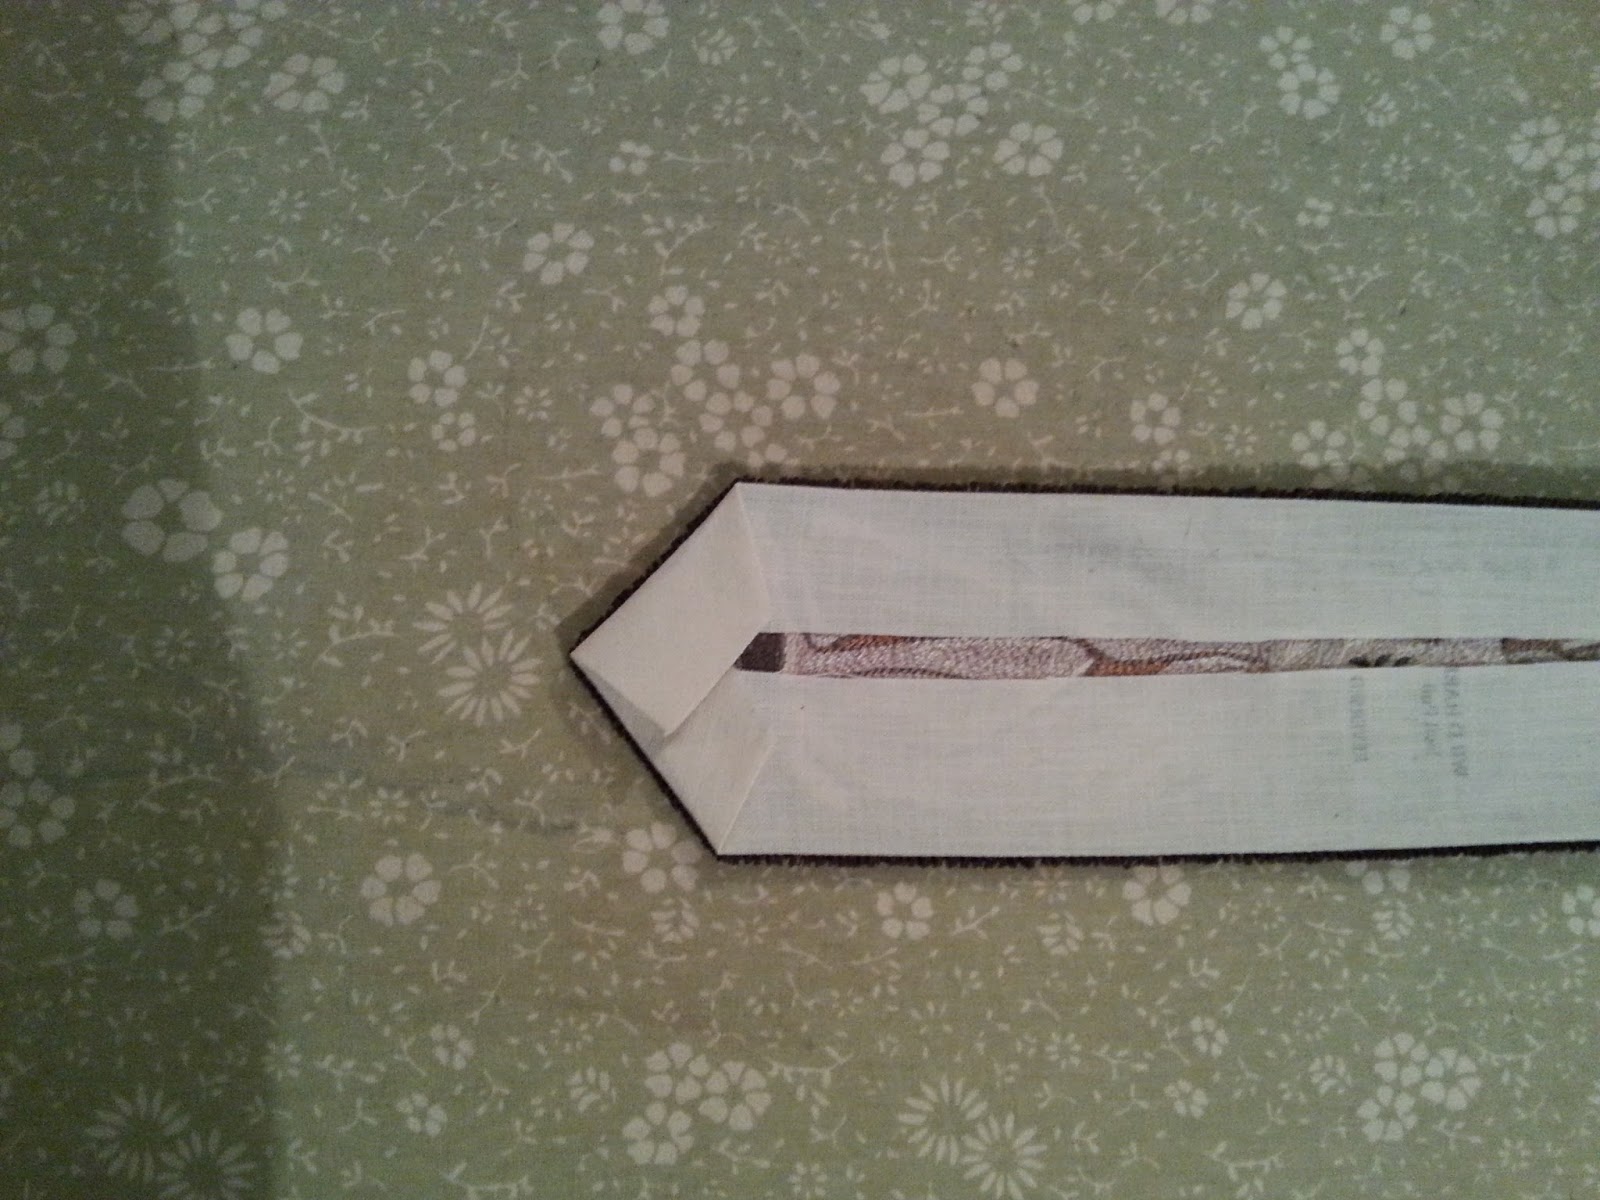
Then fold and iron the triangle at the bottom.


Both sides of the triangle, to create a point at the bottom.


Fold the corners in at the top and then iron towards the center.


All done ironing!


When you are finished with the ironing it should look like this.


I like to back my punch needles with wool. Cut the wool leaving about an 1/8" border around the punch. At the top leave approximately 2 1/2" to 3 inches for hanging  purposes. 


Pin your backing to the punch! add your tassel or bell etc. to the bottom and blanket stitch all layers!


I added a wool penny to the top and inserted a hole in the center so I could hang it on my cupboard where I keep a hook on the inside permanently for seasonal hanging. You could also use a command strip or a thumbtack.


All Finished and ready for your seasonal display! 
Hope this helps! 
Kate


Saturday, November 28, 2015

Easy Dots


It is always easiest to start with the little things first,
 then work your way to the background.


Jump from dot to dot, by placing your finger on the finished dot. 
Then pull a little loop to the next dot. Continue till the dots are filled.


Then using a small pair of scissors snip the remainder of the loops as close as you can to the dot. 
Don't worry they won't pull out.
Wa la Quick and easy!

Happy Punching,
 Kate

Monday, October 19, 2015

Hoops vs Frames


 HOOP vs FRAME

Common Embroidery Hoop

You can use a common embroidery hoop, but let me point out, your fabric has got to be drum tight to punch, or your loops will be uneven. When using a common embroidery hoop the fabric tends to loosen up as you work and you will you’ll find you are always pulling the fabric to make it tight. 

Morgan Hoop

Detail of groove on the Morgan Hoop


The Morgan Hoop is engineered to hold the fabric taut. It has a groove in the ring that keeps the fabric in place. They come in a variety of sizes from 5”, 7”, 9”, 10”, 12”, 14”, and 17” diameter.


They also have a lap stand that holds two usable hoops one smaller on larger (varying sizes also) to set on your lap as you work.


I also found there is a floor stand that hold varying hoop sizes. Until I started researching this post. I never knew they existed. 
Isn't it wonderful to be constantly learning.

They are a good investment but perhaps wait until you know if this hobby is the hobby for you.
Many people swear by the Morgan Hoop and never switch to a frame.

 I also want to point out that with any hobby or craft the better the tools the more enjoyable you will find your process.

Grubers rug hooking frame
If you find this is something you will do daily. I suggest a hooker frame. A hooker frame is about 14” x 14” square, and has gripper strips on the edges, with gnarly little teeth on all four sides.  These little teeth can draw blood if you are not careful, sounds like a monster I know, but I love mine. 

My Punching Area
I mounted mine to a small table at a straight back height, for the purpose of good posture. Be careful, holding a hoop can eventually give you arthritis and to help prevent this, a hookers frame is the way to go!

Detail of Pivot on Hooker frame

Let me also add, a frame with a center pivot point affords you the ability to spin your work without removing it.
If you decide you would also like to try rug hooking with wool strips, the hookers frame can be used for this also, so it is dual duty.

There are many frames on the market. You can Google Hookers Frames and make the appropriate choice for you.

There are many choices on the market for hoops and frames. These are just two, they are simply suggestions. Google, shop and enjoy the buying experience. I know at first it seems daunting and you're excited to get started or try new equipment but take the time and do the research. It is all part of the fun of Punch Needle!

Happy Shopping, 
Kate

Next post Fabrics!


Friday, September 25, 2015

The Punch Needle


Punch Needles


I have found with many punchers that they have their own personal preferences. It is usually the one they started with, the one they became familiar with. As with most tools the better the tool the better the finished product. There are many needles on the market. But as a rule, it boils down to two or three favorites. I'll try and give a brief description on two of these, the Ultra Punch Cameo and the CTR's.


Bottom to top: (blue) CTR one strand needle, (red) CTR three strand needle, (black) six strand needle, (blue) Ultra punch Cameo needle medium, (Green) Daisy Three strand Needle.


Bottom to top: (blue) one strand CTR, (red) three strand CTR, (black) six strand CTR, (blue)  six strand medium Cameo Ultra Punch

A punch needle comes basically in three sizes: small, medium and large. I am not referring to the handle or the overall dimensions but the metal needle itself. I am referring to the thickness of the metal needle. In the CTR needles my preferred needle, small (blue) is for use with one strand of floss. medium (red) is for 2, 3 or 4 strands of floss, and the large (black) is for 4, 5, or 6 six strands of floss. Keep in mind the Cameo does not hold true to this. The small Cameo is for 3 strands, the medium for 6 strands and the large is for wool weight yarns. So if you are going to punch any small details I would suggest the CTR needles. 


The Ultra Punch Cameo is larger in overall dimension. It almost looks like a pen. It has an adjustable needle length, easily adjusted with a little nub on the side. It is made of plastic and to me the metal needle itself is generally thicker than most other brands of needles. I do own one of these but do not use it.   Again, it is not my preferred needle because of the thickness of the metal needle itself. Many people swear by it because it's like holding a pen. I personally find it cumbersome and not easy to thread. 


 Comparison: The CTR is made of metal, a more substantial material, lightweight and very easy to maneuver. The loop length is adjusted by the little sectioned rubber sleeves that slip over the needle and works as a stop point against the fabric. To be honest it is a very rare occasion that I change the loop length. The metal needle itself is fine and slides through the fabric like butter. The overall benefit is the ability to change your needle for smaller areas and detail work. In addition is much easier to thread than the Cameo, which is a huge bonus.


Super Luxo Needle

In conclusion there are many different needles available on the web, Cameo and CTR are the two most popular. It is of my opinion that if you are punching strictly six strand punches then consider the Cameo. If you are planning to punch with small detail or are considering punching small punches like brooches then consider the CTR.

I hope this has been helpful and has answered any questions you may have on the difference between CTR's and Cameo's. If you need or have any more questions please leave a comment in the comment box and I will try and answer it to the best of my knowledge.

The next post threading the CTR and Cameo needles.

Thank you and Happy Punching!

Kate


Wednesday, September 23, 2015

Shopping List

ITEMS YOU WILL NEED


A. Punch Needle


 B. Embroidery hoop


C. Weavers cloth
D. pattern or design


E. Small pair of scissors


F. Embroidery floss,Valdani, DMC, etc.


 G.  felt tip pen or transfer pencil


H. iron, preferably a newer version


Well that's it!
The tips page has officially started! I hope I can keep it interesting and fun. If you like you can subscribe to the posts on the side. Follow along with me while I break down punch needle tools and techniques.

Have a wonderful Day, and as always Happy Punching!

Kate