
"Jack the Rabbit"
Bell Pull

First off enjoy punching Jack!
Cut a border leaving 1" off weavers cloth on all sides.

Fold and Iron the weavers cloth to the inside creating a hem.
I use the hottest setting, and start with the long sides.

Then fold and iron the triangle at the bottom.
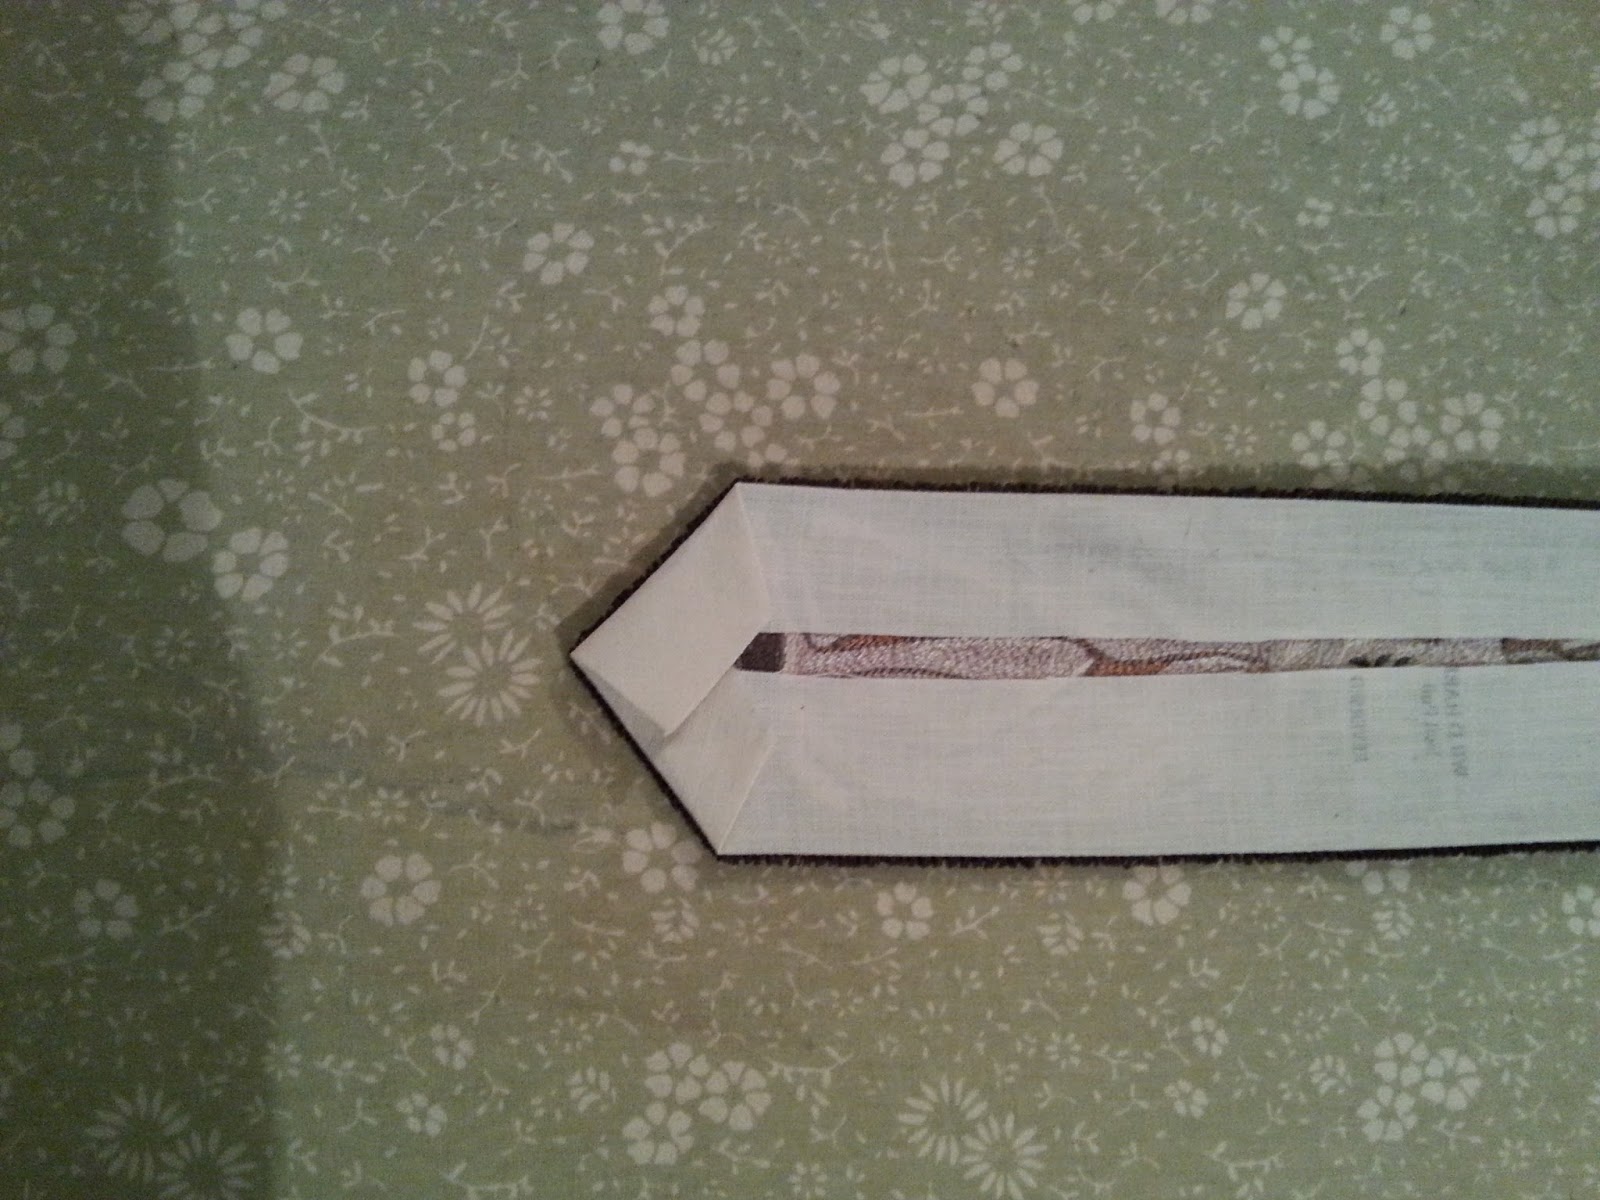
Both sides of the triangle, to create a point at the bottom.


Fold the corners in at the top and then iron towards the center.

All done ironing!

When you are finished with the ironing it should look like this.


I like to back my punch needles with wool. Cut the wool leaving about an 1/8" border around the punch. At the top leave approximately 2 1/2" to 3 inches for hanging purposes.

Pin your backing to the punch! add your tassel or bell etc. to the bottom and blanket stitch all layers!

I added a wool penny to the top and inserted a hole in the center so I could hang it on my cupboard where I keep a hook on the inside permanently for seasonal hanging. You could also use a command strip or a thumbtack.


All Finished and ready for your seasonal display!
Hope this helps!
Kate
Live it. Thanks for the tutorial.
ReplyDeleteJennie, You're welcome,Thank you for your interest...Kate
ReplyDeleteGreat tutorial. I do the same thing but without the penny. Much nicer finish.
ReplyDeleteThanks so much.
This comment has been removed by a blog administrator.
ReplyDelete